BBR · Compatibility-first pad utility
How to replace bike brake pads—start with what fits
A pad that looks right can still have the wrong mount, direction, compound, or rim approval. Clear three fit checks before touching a fastener.
1 of 3 · Brake
Which brake holds the pads?
Choose by the mechanism at the wheel—not by the shape of a shopping result.
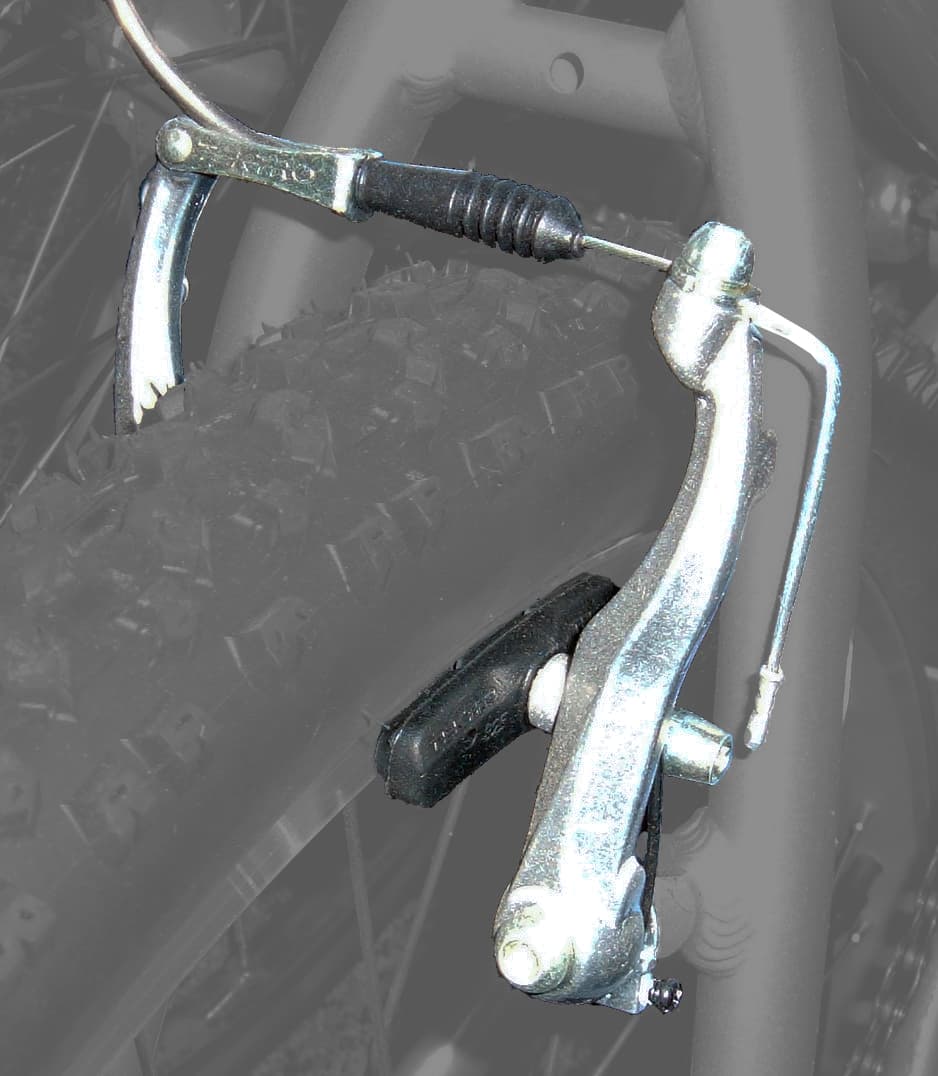

Identification boundary
This page continues only when this mechanism matches
A V-brake has two long arms mounted beside the rim and commonly uses a curved metal noodle to guide the cable. A caliper arch, cantilever, disc caliper, drum or unknown system needs its own procedure.
Compare all three brake photosStop-riding conditions
Replacement is not safe when the rest of the system is unknown
- The pad contacts the tire or can slide into it.
- The rim is cracked, deeply worn, deformed, or has an uncertain braking surface.
- The cable is rusty, frayed, cracked, crushed, or slipping.
- Oil or grease reached the shoes or braking track.
- A fastener, washer order, model, torque, or rim material cannot be confirmed.
- Braking remains weak, uneven, noisy, or uncertain after installation.
Do not ride until the cause is corrected and the brake passes stationary and controlled low-speed checks. Use a qualified bicycle mechanic when any state is uncertain.
Sourced sequence
We did not perform this repair. These are safety and decision checkpoints distilled from the linked technical sources; the actual brake and wheel manuals control.
Seven checkpoints for a threaded V-brake shoe
- 01
Confirm replacement is needed
Grooves worn away, oil or grease contamination, cracking, embedded debris, or a maker-defined wear limit can require action. Weak braking alone can also come from cable, rim, alignment, or damage.
- 02
Clear all three fit gates
Confirm V-brake, the exact pad mount, and the wheel maker’s approved pad/rim combination before choosing a product.
- 03
Record the starting arrangement
Keep your own close reference of left/right orientation and the washer stack. The actual brake manual—not memory or another bicycle—controls reassembly.
- 04
Remove one shoe at a time
Release the brake only by the maker’s method. Remove one old shoe so the other side remains a visual reference; never let parts or tools damage the rim or tire.
- 05
Install and align
Use the specified orientation, washer order, fitting and torque. The entire braking face must meet the rim track and must never touch the tire.
- 06
Restore clearance and centering
Reconnect the brake release or cable, then follow the component instructions for pad clearance, centering and any permitted toe-in.
- 07
Verify before riding
Operate the lever repeatedly, inspect fastening/contact/release, test firmly while stationary, then test at controlled low speed in a safe area. Stop if performance is uncertain.
Technical references
Use the record for the actual brake and rim
- Shimano V-brake user manual — wear grooves, contamination warning and pre-ride checks.
- Shimano general dealer manual — model-specific cartridge direction, retaining pin and V-brake setup.
- Shimano brake-shoe compatibility — cartridge status, rim recommendation and model options.
- Park Tool rim-pad replacement guide — rim-brake pad types and service sequence.
- Kool-Stop Thinline Threaded specifications — option dimensions, construction and variants.
Shimano’s current chart lists `M70T3` for Alumite rims only. That is why this site does not turn a seller’s generic “V-brake pad” label into a universal fit claim.