BBR · P74 consolidated system + remover utility
Cassette vs freewheel: find the right freewheel removal tool
First watch the centre fitting. Then carry the exact spline or notch family, diameter, axle clearance, condition and current specifications into a removal-tool decision—without guessing from sprocket count.
Start with the fit
Cassette and freewheel need different tools
Follow the clue
Look at the centre fitting, not gear count
Choose the next check
Confirm spline, diameter, and axle clearance
1 of 3 · Prepare
Is the rear wheel safely removed?
The deciding movement is at the centre of the sprocket set. Do not perform this test with the wheel installed.
9-field freewheel removal tool Check
Count the fitting. Measure it. Clear the axle.
The same number of splines does not mean the same remover. This check separates FR-1.3, FR-2, FR-3, FR-4, FR-6, FR-7 and FR-8 paths, stops damaged fittings, and closes duplicate purchases before a product page appears.
No result yet
“Twelve spline” is not enough
The structural difference
Ask which ratchet comes off with the sprockets
On a cassette system, the sprockets slide off and the ratcheting freehub stays on the wheel. A threaded freewheel carries its ratchet inside the removable sprocket unit and unthreads from the hub.
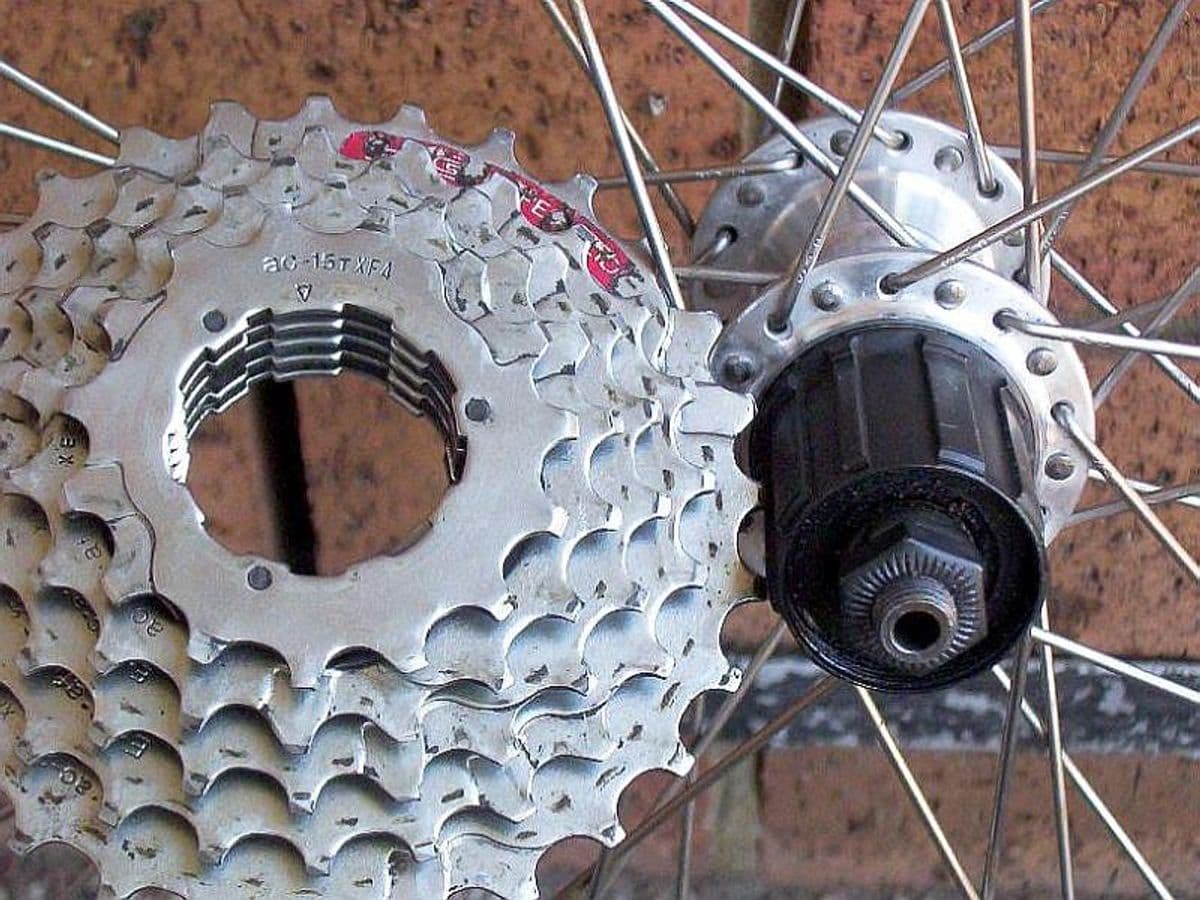
Cassette: ratchet stays on the hub
Rado bladteth Rzeznicki · public domain. Found through Google; not our component or repair.

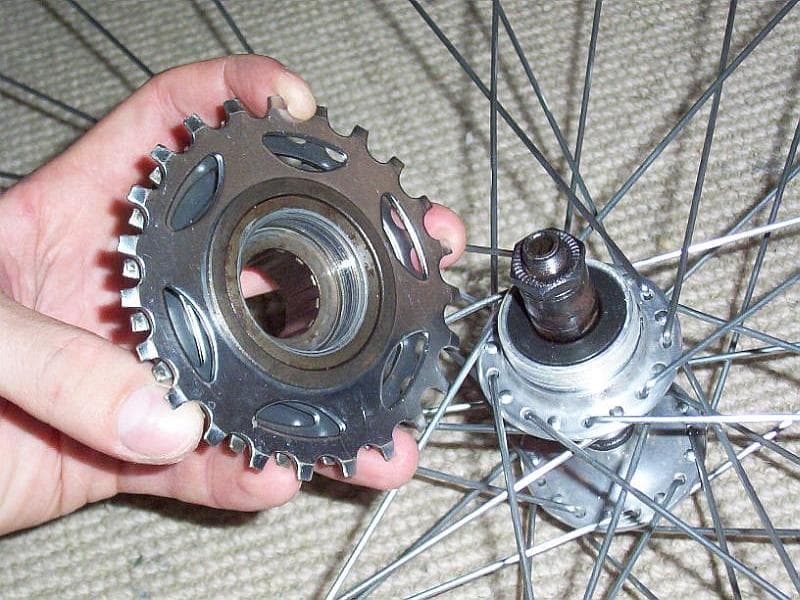
Freewheel: ratchet leaves with the sprockets
Rado bladteth Rzeznicki · public domain. Found through Google; not our component or repair.

30-second test
This observation comes from Park Tool. It is more reliable than guessing from age, price or gear count.
Watch the removal fitting—not the sprocket teeth
- 01
Remove the rear wheel safely
Follow the bicycle, axle, brake and—if relevant—e-bike maker instructions. Remove the quick-release skewer or axle nut only when the service procedure requires it.
- 02
Find the tool fitting
Look at the splines or notches around the axle where a remover would engage. Do not watch the outer sprocket teeth.
- 03
Spin the sprockets backward
Turn the sprocket cluster in its freewheeling direction and watch the centre fitting at the same time.
- 04
Read the movement
Fitting turns with the sprockets: cassette/freehub. Fitting stays still while sprockets turn around it: threaded freewheel.
- 05
Verify the exact interface
Read maker/model markings and match spline or notch count, diameter, depth and axle clearance before choosing a remover.
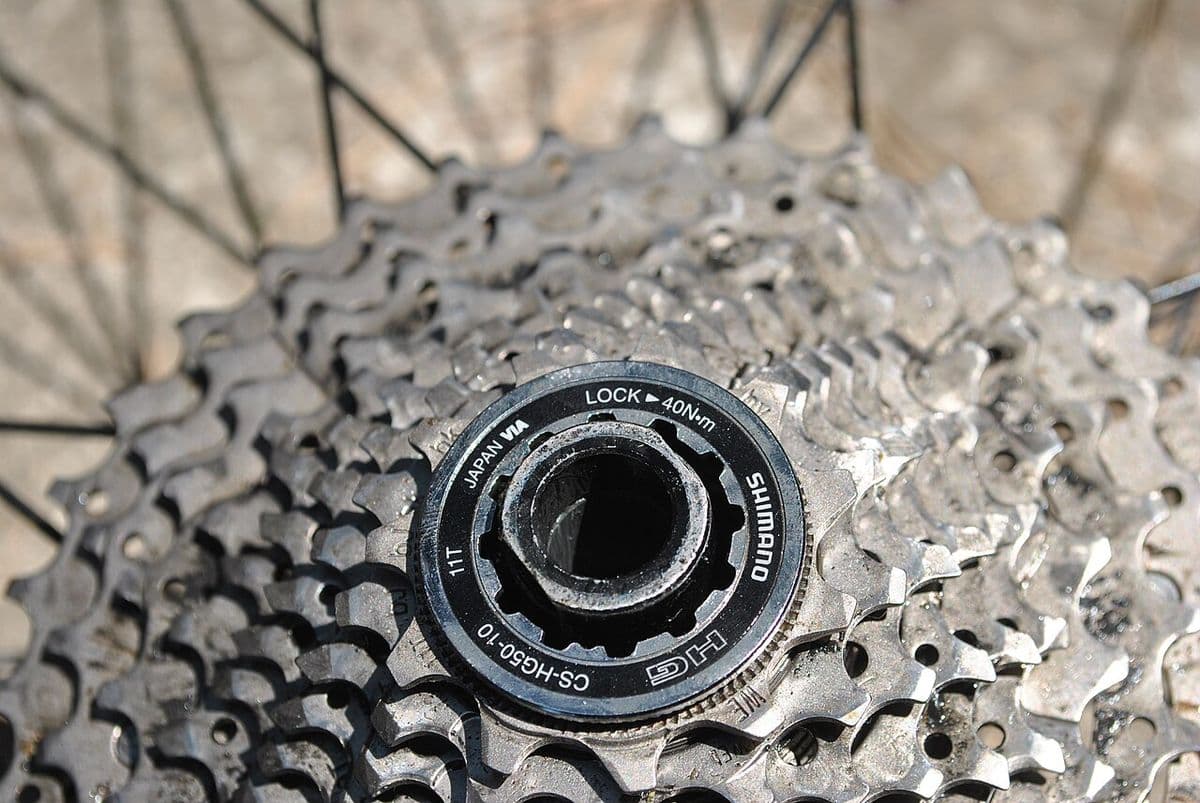

Do not trust the ring alone
A cassette lockring moves with the cassette
This common lockring has visible removal splines and torque text. But some freewheels also show an assembly ring near the smallest sprocket, and SRAM XD hides the locktube deeper in the stack. Movement plus the component record makes the decision.
The one observation to remember
Spin sprockets backward: centre fitting moves = cassette; centre fitting stays still = threaded freewheel.
Stop conditions
Do not let “almost fits” become damaged splines
- The remover does not fully engage or rocks in the fitting.
- Maker, model, spline/notch count, diameter or axle clearance is unknown.
- The fitting is shallow, rounded, cracked, corroded or already damaged.
- A hub motor cable, unusual axle or old non-lockring freehub changes the procedure.
- The wheel, hub, spokes or dropout show damage or movement.
- The required force, retention method or installation torque is uncertain.
Stop before applying leverage. Park Tool notes that some old, shallow or tool-less freewheels do not have a safe normal removal path; destructive removal is a separate procedure and can ruin the freewheel.
Before buying sprockets
“It has the same number of gears” is not compatibility
System
Cassette/freehub or threaded freewheel—confirmed by movement or an exact component record.
Mounting standard
The cassette driver body (such as documented HG, XD/XDR or another standard) or the freewheel hub thread.
Drivetrain match
Speed count, compatible chain and shifter family, plus any maker-defined construction limits.
Range
Smallest and largest sprocket, rear-derailleur total capacity, largest-cog limit and chain length.
Stack details
Required spacer, lockring, axle clearance and the component maker’s installation torque.
Example: SRAM documents that an XD cassette can use an XDR driver with a 1.85 mm spacer, while an XDR cassette is XDR-only. That is why this page does not promote a replacement cassette after system identification alone.
Technical references
Use the record for the actual hub and sprockets
- Park Tool cassette/freewheel identification — centre-fitting movement test and remover compatibility table.
- Park Tool cassette removal and installation — lockring, chain-whip, spacer and installation sequence.
- Park Tool freewheel removal and installation — threaded-freewheel tool table and removal sequence.
- Shimano cassette installation/removal manual — sprocket alignment, tools and lockring installation.
- SRAM cassette and driver-body compatibility — XD/XDR spacer and engagement requirements.
This site did not perform the repair or test the tools. The linked manufacturer instructions and the exact component documentation control.